Grab My Blinkie

I design for...


About Me
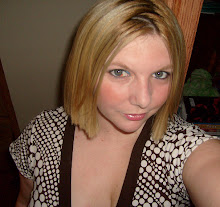
- Alika
- I am Angela aka Alika. PSPing for 8 years, have been making kits for a lil over a year. I have two children. 1 daughter who is 3 and 1 son who is 20 months. You may use my scrap kits in your tutorials or challenges but please link them back to me. Thanks! I would love to see your creations with my kits please email them to alikasscraps@hotmail.com and I will add them to my blog!
Thursday, November 26, 2009
 Looking for new blinkies!
I need a few blinkies for my scrapkit blog and my tutorial blog. I am really bad at them and I would be willing to pay. If you are a blinkie maker can you please email me at alikasscraps@hotmail.com

Friday, November 6, 2009
Pink Goth

Supplies:
Paint Shop Pro
Tube of Choice
I am using the lovely artwork of Ismael Rac, you may purchase his work HERE
Scrapkit: Is this Love by BEA Creations HERE
Open a new image 600x600 transparent
Copy and paste as new layer from scrapkit frame 4
Copy and paste as new layer from scrapkit element: wrap 1 (the black one)
Using the mover tool move the image so its over the pink wrap on the frame, you shouldnt be able to tell somethings under it.
Click on the frame layer
Effects, 3d effects, drop shadow: 2, 4, 100, 7.25
Select inside the frame with your magic wand tool, make sure you hold down shift and select all three transparent parts of the frame
Selections, modify, expand, by 18 pixels
Copy and paste as new layer paper 5
Selections, invert
Edit, clear
Selections, select none
Drag the paper layer under the frame
Copy and paste as new layer your tube of choice
I had to resize mine by 80 percent
Effects, drop shadow, use the same as before
Duplicate the tube
Drag the copied layer making sure its above the frame but underneath the extra layer
Using selection tool, with rectangle, select a small portion of the duplicated tube at the bottom
Edit, clear
Make sure none of the tube is overlapping the frame but instead looks like its behind it
Highlight your original tube layer using the eraser tool erase any parts of your tube that is extended past the frame
Copy and paste flower 4 as new layer
Resize by 80 percent
Using the mover tool move it to the bottom right of your frame like mine
Using the mover tool move it to the bottom right of your frame like mine
Drop shadow same as before
Copy and paste flower 3 as new layer
resize by 80 percent
Move to bottom right of frame like mine, overlapping the black flower
Drop shadow same as before
Copy and paste candle 1 as new layer
Image resize by 50 percent
Drop shadow same as before
move down to bottom of frame infront of roses
Copy and paste as new layer flower 9
Move to bottom left of frame like mine
Drop shadow same as before
Copy and paste new layer flower 10
Move to bottom left of frame, overlapping flower 9 a bit
Drop shadow same as before
Copy and paste as new layer butterfly 2
Image mirror
Resize by 80 percent
Move to inside of right frame
Drop shadow same as before
Add any additional elements as you wish
Open up the mask but minimize in PSP
Copy and paste as new layer paper 9
Copy and paste as new layer paper 9
Layer, new mask layer from image, choose the wsl_mask84
Invert mask UNCHECKED
Merge group
Image reize by 110 percent
Drag layer to bottom making it the second layer
On first layer should be blank, flood fill white
Add your credits and copyrights on image
Add your name
I used font ViceroyJF size 72 stroke 3 black and #e16d93
Thats it! Hope you like and if you wish to share your creations so I can put it on my blog please email me at angelapage77@hotmail.com
Sunday, November 1, 2009
Leaves

This is a quick and simple tut!
Supplies:
Paint Shop Pro
Animation Shop
Animation Shop
Tube of choic
I am using the lovely artwork of Ismael Rac, you may purchase his work HERE
Lacarolita's Designz Fall is Here kit HERE
Plugin: DSB Flux Bright Noise
Open new image 600x600
Copy and paste as new image frame 4
Resize by 50 percent
Drop shadow: 2, 4, 100, 7.25, black
Using magic wand select inside frame
Expand by 13
Paste as new layer paper 3
Invert selection
Clear
Select none
Drag the paper layer underneath the frame layer
Copy and paste as new layer your tube
Drop shadow tube
Duplicate
Drag original copy layer underneath the frame but above the paper
On the duplicated layer, using eraser tool erase parts that are overlapping the bottom of the frame.
Leave the top if you wish, this gives it a look as if the tube is coming out of the frame
Copy and paste as new layer Ivey2 element
Resize 50 percent
Drop shadow
Duplicate
Image, Mirror
Merge down with the first copy of it
Drag layer to bottom
Copy and paste butterfly4 element
resize by 50 percent twice
arrange like mine on tag
drop shadow
Copy and paste bow2
resize by 50 percent three times
arrange at top right of tube
drop shadow
Add any more elements that you would like
Add credits
Hide the lvy layer in the background behind the frame
Merge visible
Unhide the Ivy layer
Add your name
I used font Today, size 72, stroke 3, stroke black, filler 950000
Duplicate the ivy layer twice
First layer use plugins DSB flux, bright noise, settings at 40
Click on the second layer, repeat plugin but click mix once
Click on the third layer, repeat plugin but click mix twice
Hide the second and third layer
Make sure your main image is highlighted
Edit, copy merged
Paste into animation shop as new animation
Go back to tag, hide first layer, unhide second layer
Edit, copy merged
Paste into animation shop after current frame
Repeat for the third layer
Save animation and your done!
Subscribe to:
Posts (Atom)
Stay Away
My Hideouts :O